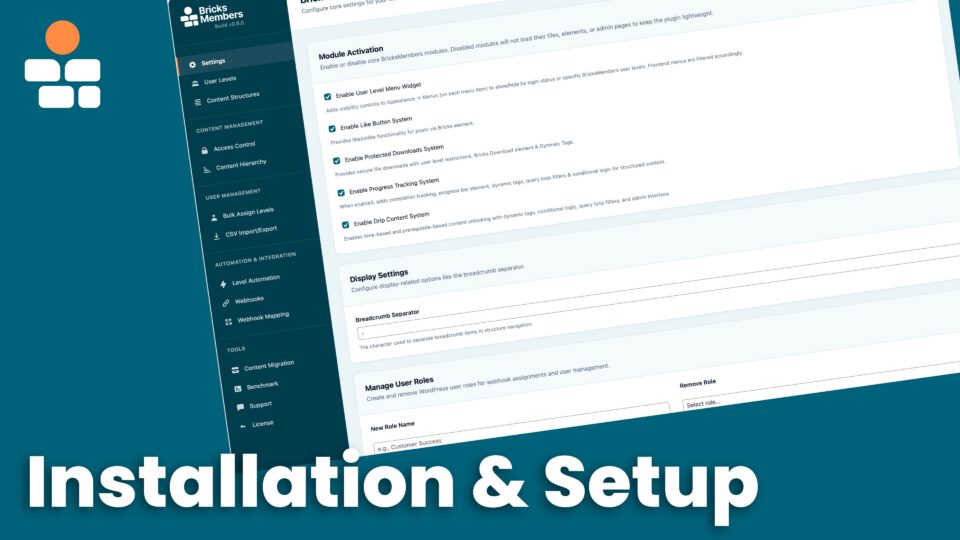
Getting BricksMembers up and running is straightforward. There’s no setup wizard, no complicated configuration, just install, activate, and you’re ready to create your first membership level.
This guide walks you through the entire process, from uploading the plugin to creating your first protected post.
Before You Begin
Make sure you have:
- WordPress 6.2 or higher installed
- Bricks Builder activated
- Admin access to your WordPress site
- The BricksMembers plugin file (
.zip) - Your BricksMembers license key (you’ll need this immediately after activation)
Time required: 10-15 minutes
Step 1: Install the Plugin
Upload Method
- Log in to your WordPress admin dashboard
- Go to Plugins → Add New
- Click the Upload Plugin button at the top
- Click Choose File and select the
bricksmembers.zipfile - Click Install Now
- Wait for the upload and installation to complete
- Click Activate Plugin
That’s it. BricksMembers is now active on your site.
What Happens During Installation?
When you activate BricksMembers, the plugin automatically:
- Creates the core BricksMembers database tables (with your WordPress table prefix):
brm_levels for level definitions, brm_user_level_assignments for user levels, brm_post_level_requirements for protected-content requirements, brm_user_post_completions for direct completions, and brm_post_data for structure/access projection data.
- Registers custom post meta fields
- Adds admin menu items
- Loads default settings
Note: Two additional tables are created when you enable optional modules:
brm_user_progress– Created when Progress Tracking module is enabledbrm_user_unlocks– Created when Drip Content module is enabled
Upgrade note for older sites: Current BricksMembers releases start on the normalized storage runtime. The older one-time storage upgrade notice introduced in 0.9.82 was retired in 1.1.12.
Upgrading from Members for Bricks Builder: If this site used the Free plugin before, BricksMembers keeps the shared levels, user assignments, protected-content rules, and Stripe EasySync setup. When both plugins are active, BricksMembers deactivates the Free plugin and shows a notice so only one plugin controls access. See Upgrading from Members for Bricks Builder Free.
You don’t need to run any setup wizard or click through configuration screens.
Step 2: Activate Your License Key
Important: You must activate your license key to receive plugin updates and BricksMembers support.
- Go to BricksMembers → License & Support → License in the admin menu
- Enter your license key in the “License Key” field
- Click the Activate License button (blue button)
- You’ll see a success message: “License activated successfully”
- The “License Status” card will show “Active” with a green badge
What if I don’t activate my license?
- The plugin continues to work – no features are blocked
- You won’t receive plugin updates
- You won’t have access to support
What if my license becomes inactive later?
- The plugin continues to work (no blocking)
- You won’t receive plugin updates
- Support access will be disabled if support has expired
- Go to BricksMembers → License & Support → License and click Re-check Status to refresh
Need help with licensing? See the complete License Management guide for detailed information about license types, renewal, troubleshooting, and site migration.
Step 3: Access BricksMembers Settings
After activation, you’ll see a new BricksMembers menu item in your WordPress admin sidebar.
- Click BricksMembers in the admin menu
- You’ll see the main BricksMembers interface with a custom sidebar containing these pages:
Core Setup:
- Settings – Configure modules and global options
- User Levels – Manage membership levels
- Content Structures – Organize courses/content hierarchically
Content Management:
- Access Control – Bulk protect/unprotect content
- Content & Structures – Manage structures and parent-child relationships
- Drip Content – Set up time-based content release rules (when enabled)
User Management:
- User Levels – Manage levels and batch-assign them to users, posts, and terms
- Import / Export Users – Import/export user levels via CSV
- Level Automation – Automatically assign levels based on rules
- Automations – Build workflows from BRM events and actions
- Integrations – Manage native integrations, webhooks, and webhook mapping tabs
Tools:
- Migration Center – Migrate from other membership plugins
- Benchmark – Test plugin performance
- Support – Submit support tickets
- License & Support – Manage your license key and support access
Let’s configure the basics.
Step 3: Create Your Content First
Important: Before enabling modules, create your content structure and user levels first.
The Progress Tracking and Drip Content modules trigger heavy computations when enabled. It’s much more efficient to:
- Create your user levels
- Create your content structures
- Protect your content
- Then enable modules
This way, the modules only compute data for your actual content, not empty data.
We’ll cover modules in Step 6 (after you’ve set up your content).
Step 4: Configure Basic Settings (Optional)
Click BricksMembers → Settings to access the settings page.
Most settings can stay at their defaults, but you might want to configure access redirects.
Meta box cleanup (optional): If you do not use video fields on posts or pages, go to BricksMembers → Settings → General → Field Visibility and hide the BRM Video, Duration, or Image fields per post type. User level fields are always visible.
Access Control Settings (Optional)
Note: Access redirects are optional. The recommended approach is to use Bricks conditional logic to show/hide content (covered in the “Protecting Your Content” guide). Redirects are a simpler but less flexible alternative.
Logged-Out User Redirect
- Where should non-logged-in users go when they try to access protected content?
- Common options: Login page, sales page, homepage
- Leave blank if you’re using Bricks conditional logic instead
Insufficient Access Redirect
- Where should logged-in users without the required level go?
- Common options: Upgrade page, account page, homepage
- Leave blank if you’re using Bricks conditional logic instead
Excluded Pages
- The plugin automatically excludes login, registration, and password reset pages from redirects
- You can add additional pages if needed (e.g., your sales page)
You can skip this for now and configure it later if needed.
Step 5: Create Your First User Level
Now let’s create a user level.
Remember: User levels can represent anything, membership tiers, course names, download access, or any combination. For this tutorial, we’ll create a simple membership tier.
- Go to BricksMembers → User Levels
- You’ll see a list of existing levels (probably empty right now)
- Click Add New Level at the top
- Fill in the level details:
– Level Name: e.g., “Premium Member” – Description: Optional description for admin reference (e.g., “Monthly subscription tier”) – Link Target: Optional – leave blank for now (you can add this later)
- Click Create Level
Your first user level is created!
Pro Tip: User levels are flexible. You can create:
- Membership tiers: “Free,” “Pro,” “Premium”
- Course names: “DaVinci Resolve Course,” “Final Cut Pro Course”
- Download access: “Photography Presets,” “Videography LUTs”
- Or mix all of the above!
See the “Understanding User Levels” guide for more details.

Step 6: Assign a Level to Yourself
Before you start protecting content, assign a level to your own user account so you can test access.
- Go to Users → All Users in WordPress
- Click Edit on your user account
- Scroll down to the BricksMembers section
- Check the box next to the level you just created (e.g., “Premium Member”)
- Click Update User
You now have the “Premium Member” level assigned to your account.
Note: You can assign multiple levels to a single user. This is useful for users who have access to multiple courses, downloads, or membership tiers.
Step 7: Protect Your First Post
Let’s protect a piece of content so only users with the “Premium Member” level can access it.
Option A: Using Quick Edit (Faster – Recommended)
- Go to BricksMembers → Content & Structures (if you have a structure)
- Click Edit on your structure
- Click Quick Edit next to any post
- Check the box next to “Premium Member” under Required User Levels
- Click Save
Option B: Using WordPress Post Editor
- Go to Posts → All Posts (or Pages, or any custom post type)
- Edit an existing post or create a new one
- In the post editor, scroll down to the BricksMembers meta box
- Under Required User Levels, check the box next to “Premium Member”
- Click Update or Publish
That post is now protected. Only users with the “Premium Member” level can access it.
💡 Tip: Quick Edit is much faster than the WordPress post editor. All BricksMembers fields (BRM Video, duration, thumbnail, required levels) are in one modal with no page reloads.
Note: The recommended way to protect content is using Bricks conditional logic (show/hide elements based on user levels). This gives you much more control and better user experience. See the “Protecting Your Content” guide for details.
Test It (If Using Redirects)
If you configured access redirects in Step 4:
- Open the post in a new incognito/private browser window (where you’re not logged in)
- You should be redirected to your login page
- Now open the post in your regular browser (where you’re logged in with the Premium Member level)
- You should see the post content normally
It works!
Step 8: Batch Assign Required Levels (Optional)
If you have many posts to protect, BricksMembers provides two powerful ways to assign required levels in batches.
Method 1: User Levels Page (Posts and Terms Tabs)
The BricksMembers → User Levels page now includes the batch assignment workflow directly in the Users, Posts, and Terms tabs. This replaces the old standalone Bulk Assign page.
1. Assign on the Posts Tab
Perfect for hierarchical content structures, filtered post groups, and one-screen batch updates.
- Go to BricksMembers → User Levels → Posts
- Use Post Type, Structure, Parents, Term, Relationship, or Related Taxonomy filters to narrow the list
- Select the rows you want to update
- Choose one or more levels in Apply Levels
- Click Apply Levels
Example: Assign “Premium Member” level to all lessons in Module 2, while leaving Module 1 lessons free.

2. Assign on the Terms Tab
Protect categories, tags, or custom terms themselves.
- Go to BricksMembers → User Levels → Terms
- Search or filter the term list if needed
- Select the terms you want to protect
- Choose the user level(s) to assign
- Click Apply Levels
Example: Protect the “VIP Resources” category so only VIP members can access it.
Pro Tip: The User Levels page also supports inline add/remove controls directly in each row. Use the row checkboxes for batch updates and the inline + button for one-off changes.
Method 2: Structure Admin UI (Recommended for Hierarchies)
When working with content structures, the Structure admin page offers smart automation options.
Option A: Inherit from Parent (When Creating New Posts)
- Go to BricksMembers → Content & Structures
- Select your structure
- Click + Add New (e.g., “+ Lesson”) on any parent item
- In the Quick Add dialog, check “Inherit required levels from parent”
- The new post will automatically copy the parent’s required levels
Option B: Apply to All Children (When Editing Existing Posts)
- Go to BricksMembers → Content & Structures
- Select your structure
- Click Quick Edit on any parent post
- Change the required levels
- Check “Apply level changes to all child posts”
- Click Save
All child posts (lessons, sections, etc.) will now have the same required levels as the parent.
Example: You have a course with 50 lessons. Instead of editing each lesson individually, just Quick Edit the course, select “Premium Member” level, check “Apply to all children”, and all 50 lessons are instantly protected.
Step 9: Enable Modules (After Content Setup)
Now that you’ve created your content structure and user levels, you can enable modules if needed.
Go to BricksMembers → Modules and enable the modules you want. Each toggle is confirmed and saved immediately.
Progress Tracking
- Turn this ON if you want learners to mark content as complete
- Enables progress bars, completion percentages, and the Progress Checkbox element
- Recommended for: Course platforms, onboarding sequences, challenges
- Creates table:
brm_user_progress(when first enabled)
Drip Content Module
- Turn this ON if you want to release content over time
- Enables time-based unlocking, prerequisites, and cohort releases
- Recommended for: Courses with weekly lessons, membership sites with scheduled content
- Creates table:
brm_user_unlocks(when first enabled)
Action Triggers Module
- Turn this ON if you want to assign levels when WordPress action hooks fire
- Great for internal events like form submissions, role changes, or lesson completion
- Recommended for: On-site automations without webhook loopbacks
Protected Downloads Module
- Turn this ON if you want to protect files (PDFs, videos, etc.)
- Enables file upload, level-based access, and download tracking
- Recommended for: Resource libraries, client deliverables, course materials
Why enable modules last?
- These modules trigger heavy computations when enabled
- By setting up content first, the modules only compute data for your actual content
- Much more efficient than enabling modules on an empty site
What’s in the Database?
Core tables (created on activation):
wp_brm_levels– Level definitionswp_brm_user_level_assignments– User level assignmentswp_brm_post_level_requirements– Post access requirementswp_brm_user_post_completions– Direct completion rowswp_brm_post_data– Post access rules and structure paths
Module tables (created when modules are enabled):
wp_brm_user_progress– Aggregated progress per user/scope (Progress Tracking module)wp_brm_user_unlocks– Drip unlock timestamps (Drip Content module)
You don’t need to interact with these tables directly, BricksMembers handles everything automatically.
Common First-Time Questions
Q: Do I need to configure anything in Bricks Builder? A: Nope. BricksMembers elements, dynamic tags, and conditions are automatically available in Bricks after you activate the plugin.
Q: Can I use BricksMembers with other page builders? A: No. BricksMembers is built specifically for Bricks Builder and won’t work with Elementor, Divi, etc.
Q: What happens if I deactivate a module later? A: Your data is preserved. If you disable Progress Tracking, for example, all completion data stays in the database. Re-enable the module and everything comes back.
Q: Can I delete the plugin without losing data? A: Yes. Deactivating BricksMembers preserves its data, and deleting the plugin preserves it by default too. Full cleanup happens only when you first enable Delete All Plugin Data under BricksMembers → Settings → Uninstall Options. Deleting posts that belong to a BricksMembers content structure is a separate opt-in choice on the same screen. Review both settings and make a backup before uninstalling when either cleanup option is enabled.
Q: How do I assign levels when users purchase? A: Use webhooks from your payment provider (Gumroad, LemonSqueezy, Stripe, PayPal, etc.). For on-site events (like a form submission or role change), enable the Action Triggers module and create a trigger instead.
Q: What if my license key expires? A: The plugin continues to work normally. You’ll see admin notices and won’t receive updates until you renew and reactivate your license.
