A course catalog is the storefront of your online learning platform. It’s where visitors browse courses, filter by category, and see their progress. This tutorial shows you how to build a professional course catalog with BricksMembers query filters.
What you’ll build:
- Course grid with thumbnails and descriptions
- Level-based filtering (show only accessible courses)
- Progress indicators for enrolled students
Prerequisites:
- Bricks Builder installed and activated
- BricksMembers installed with at least one user level
- A content structure with courses created (see Post 15)
- Progress Tracking enabled (optional, for progress bars)
Part 1: Creating the Basic Course Catalog
Step 1: Create the Catalog Page
- Go to Pages → Add New
- Title: “Courses” or “Course Catalog”
- Click Edit with Bricks
Step 2: Add the Page Header
- Add a Section element
- In the Container (automatically inside the Section), set max-width: 1200px
- Add a Heading (H1): “Browse Our Courses”
- Add a Text element: “Explore our comprehensive library of courses.”
Step 3: Create the Course Grid
- Add a new Section below
- In the Container (automatically inside the Section)
- Add a Div element
- Enable Use query loop
- Configure the query:
- Query type: Posts
- Post type: course (or your course post type)
- Posts per page: 12
- Order by: Date
- Order: DESC (newest first)
Step 4: Add BricksMembers Filter
- Scroll down to BricksMembers Query Filters in the Content tab
- User Level Match: Match + Empty
- This shows courses the user can access + public courses
Why “Match + Empty”?
- Match: Shows courses the user has access to
- Empty: Shows courses with no required levels (public/free courses)
- Result: Users see all courses they can access, including free ones
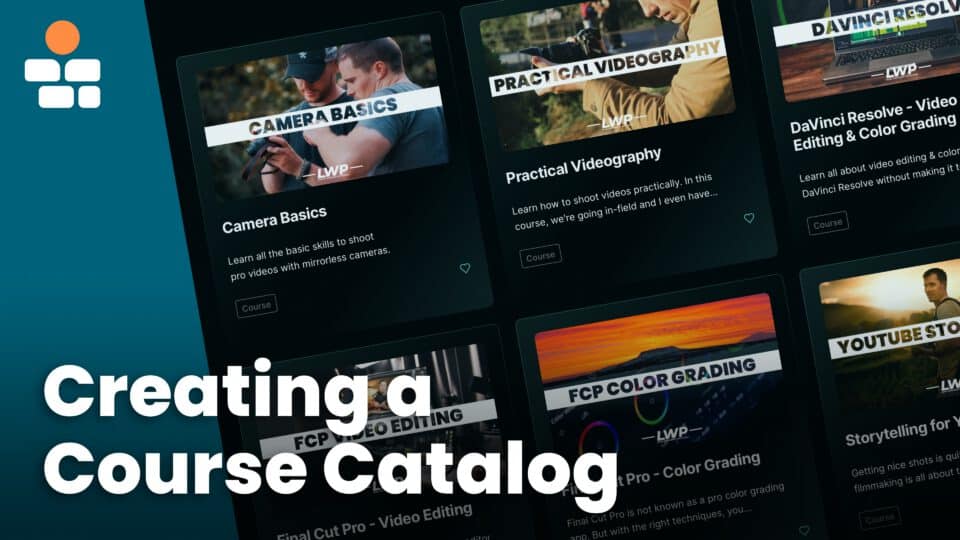
Step 5: Design the Course Card
Inside the query loop div:
1. Add a class to the Div: course-card
2. Add a Featured Image
- Add an image element
- Use dynamic data:
{featured_image}
3. Add a Heading (H3)
- Text:
{post_title}
4. Add a Text Element (Excerpt)
- Text:
{post_excerpt}
5. BRM Progress Bar (optional, requires Progress Tracking enabled)
Show enrolled students their progress for each course:
- Inside the course card, add a BRM Progress Bar element (under BricksMembers category)
- Configure the settings:
- Progress Mode: Auto (Smart Detection)
- Progress Level: Current Level (or Top Level – both work in query loops, but Current Level is more explicit for showing each course’s own progress)
- Show Progress Text: Yes (shows percentage)
- Show Progress Details: Yes (shows “X of Y completed”)
- The progress bar automatically detects the current course from the query loop context
- Style the progress bar (colors, height, border radius) in the Content tab
What students see:
- Not logged in: No progress bar (hidden)
- Not enrolled: Empty progress bar (0%)
- In progress: Partially filled bar with percentage (e.g., “45% – 9 of 20 completed”)
- Completed: Full bar (100%)
Alternative: You can also use Manual mode with {post_id} in the Content ID field – both methods work in query loops.
6. Button
- Text: “View Course” or “Start Learning”
- Link:
{post_url} - Style: Primary button
Step 6: Style the Grid
- Select the Container element that wraps the Query Loop Div
- Go to Style tab
- Display: Grid
- Grid template columns:
repeat(auto-fill, minmax(300px, 1fr)) - Gap: 30px
What this does:
- Creates a responsive grid
- Each card is at least 300px wide
- Cards automatically wrap to new rows
- 30px spacing between cards
Step 7: Style the Course Card
- Select the Div (course card)
- Style as desired with border, padding, box shadow, and hover effects
Step 8: Publish and Test
- Click Publish
- View the page
- You should see a grid of course cards
Test:
- Log out and check which courses appear
- Log in as a free member and check
- Log in as a premium member and check
Expected: Each user sees only courses they have access to (plus public courses).
Part 2: Adding Category Filters
Let’s add category buttons so users can filter courses by topic using Bricks’ native query filtering.
Step 1: Assign Categories and Tags to Your Courses
Since your courses are managed through BricksMembers content structures, you can easily assign categories and tags using the Quick Edit feature with a modern autocomplete interface:
- Go to your Content Structure page (e.g., BricksMembers → Courses)
- Click the Quick Edit icon (flash) next to any course
- Scroll down to the Categories & Tags field
- In the search field, start typing a category or tag name
- A dropdown will appear showing:
- Matching existing categories/tags you can click to add
- A + Create option (with + icon) if the term doesn’t exist yet
- Click on a term to add it – it appears as a tag below with the taxonomy type in parentheses (e.g., “WordPress (Cat.)” or “beginner (Tag)”)
- Each tag has two buttons:
- × – Remove from this post only
- 🗑 – Delete permanently from WordPress (removes from ALL posts)
- Click Save when done
Example workflow:
- Type “WordPress” → Click existing “WordPress Development” category OR click “+ Create ‘WordPress’ in Categories”
- Type “beginner” → Click “+ Create ‘beginner’ in Tags”
- Type “tutorial” → Click “+ Create ‘tutorial’ in Tags”
- All selected terms appear as removable tags below the search field
Step 2: Filter by Category (Optional)
If you want to show only courses from specific categories, you can filter your query loop:
- Select your query loop Div element (the one with “Use query loop” enabled)
- In the Content tab, scroll to the Query section
- Find Terms (Include/Exclude)
- Click + Add Taxonomy Query
- Configure the filter:
- Taxonomy: Select “Categories” (or your custom taxonomy)
- Terms: Select specific categories to include (e.g., “WordPress Development”, “Web Design”)
- Operator: IN (to include selected terms) or NOT IN (to exclude them)
- The query loop will now only show courses that have the selected categories
Alternative: Create separate catalog pages for each category by creating multiple pages, each with its own filtered query loop.
Part 3: Adding Pagination
For large course catalogs, add pagination to split results across multiple pages.
Step 1: Configure Query Loop Pagination
- Select your query loop Div element
- In the Content tab, find the Query section
- Set Posts per page: 12 (or your preferred number)
- Leave pagination enabled (this is the default)
Step 2: Add Pagination Element
Bricks automatically detects query loops and connects pagination elements to them:
- Below the query loop section (but outside the query loop Div), add a Pagination element
- The pagination element automatically detects the nearest query loop on the page
- No additional configuration needed – it works out of the box!
- Style the pagination in the Style tab to match your design:
- Adjust colors, spacing, border radius
- Choose pagination type (numbered, prev/next only, etc.)
Important: Place the Pagination element outside the query loop container, not inside it. Otherwise it will repeat for each course.
Result: Users can navigate through multiple pages of courses with page numbers and prev/next buttons.
Part 4: Advanced Features
Feature 1: “No Results” Message
Show a message when no courses match the filters.
- Below the query loop, add a Text element
- Text: “No courses found. Try adjusting your filters.”
- Go to the Bricks conditions tab
- Add condition: Query Loop → Has No Results
Result: Message only appears when the query returns 0 courses.
Part 5: Best Practices
Practice 1: Write Compelling Descriptions
- Keep excerpts to 2-3 sentences
- Highlight key benefits
- Use action words
Practice 2: Enhance with Conditional Content
Make your catalog more personalized using Bricks conditions:
Show “Continue Learning” for In-Progress Courses:
- Add a Text element in the course card showing “Continue Learning”
- Go to Conditions tab
- Add condition: BricksMembers → Progress
- Set operator: Between
- Set values: 1 and 99
Result: “Continue Learning” only appears on courses with 1-99% progress (started but not completed).
Link to the last completed video or lesson:
If a course catalog card should take the learner back to the exact video or lesson they most recently finished, use the completed-item progress tag. It is different from {brm_progress:continue}: completed item means “last finished”, while continue means “next uncompleted”.
- Button URL for last completed item:
{brm_progress:completed_item:last:toplevel:url} - Button text or helper label:
{brm_progress:completed_item:last:toplevel:title} - Dashboard or standalone catalog without post context:
{brm_progress:completed_item:last:structure_id:YOUR_STRUCTURE_ID:url}
Show “Start Course” vs “Continue” Button:
- Create two button elements with different text
- “Start Course” – condition: Progress = 0
- “Continue Learning” – condition: Progress between 1-99
- “Review Course” – condition: Progress = 100
Practice 3: Optimize for Speed
- Lazy load images
- Limit posts per page (9-12 is ideal)
- Use pagination instead of infinite scroll for large catalogs
Summary
You’ve learned how to:
- ✅ Create a basic course catalog with a responsive grid
- ✅ Use BricksMembers filters to show only accessible courses
- ✅ Add category filtering using Bricks native query settings
- ✅ Add pagination for large catalogs
- ✅ Show progress indicators for enrolled students
Your course catalog is now a professional, user-friendly storefront for your online learning platform!