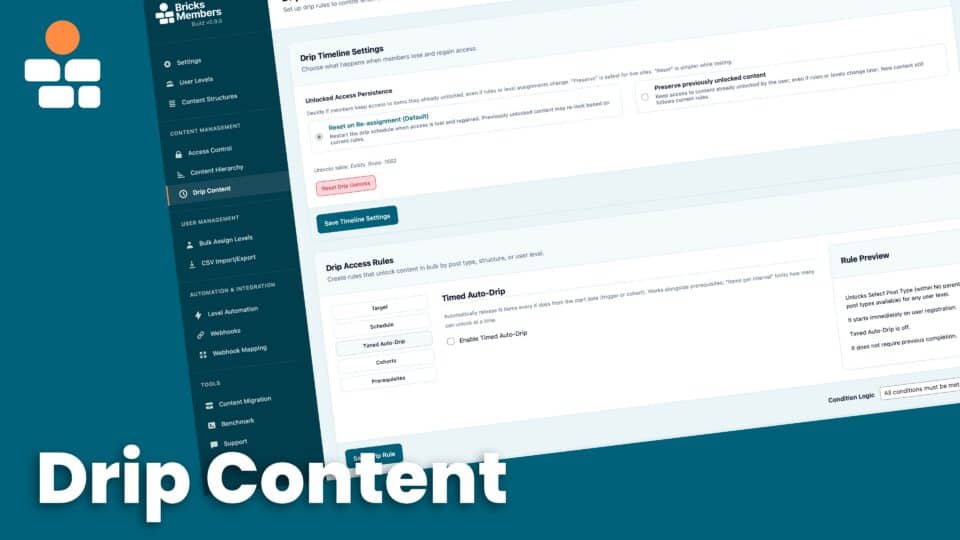
Drip content is one of the most powerful features for course creators and membership site owners. Instead of giving users access to everything at once, you release content gradually, one lesson per week, day, or after they complete prerequisites.
This guide explains how drip content works in BricksMembers and how to set it up for your courses.
Drip rules in BricksMembers are not limited to structured course content anymore. You can now drip structured content, a hand-picked list of regular WordPress posts or pages, or all published posts of a specific post type. You can also override the drip behavior for one post in the BricksMembers meta box when needed.
If you also use the Enrollments module, Drip can now start from a post enrollment activation date as well. This is especially useful for course structures where one course enrollment should unlock a whole branch and lessons should drip relative to that enrollment anchor rather than to the literal lesson post itself.
What Is Drip Content?
Drip content means releasing content on a schedule rather than all at once.
Examples:
- Time-based: Unlock Lesson 2 seven days after the user joins
- Prerequisite-based: Unlock Lesson 2 only after the user completes Lesson 1
- Combined: Unlock Lesson 2 seven days after joining AND after completing Lesson 1
- Cohort-based: Unlock content based on a group start date (e.g., January 2026 cohort) , see Groups & Team Licenses for setting up cohort-based drip
Why use drip content?
- Prevent overwhelm: Users focus on one lesson at a time instead of seeing 50 lessons at once
- Increase engagement: Users come back regularly to access new content
- Improve completion rates: Structured pacing helps users finish courses
- Create urgency: “New lesson unlocks tomorrow” keeps users engaged
- Reduce refunds: Users can’t watch everything on day one and request a refund
Enabling Drip Content
Drip content is an optional module. Here’s how to enable it:
- Go to BricksMembers → Modules
- Find Drip Content
- Toggle it ON and confirm the change
The Drip Content admin page is now available at BricksMembers → Drip Content.
The current Drip Content page has four tabs: Builder, Rules, Unlocks Log, and Settings. Most people will start in Builder for the visual rule canvas, while Rules remains available if you prefer a list/form workflow.
Unlocked Access Persistence Modes
After enabling drip content, you need to choose how it handles already-unlocked content when user access changes:
- Go to BricksMembers → Drip Content
- Open the Settings tab
- Choose your mode:
Reset on Re-assignment (Default)
- Restart the drip schedule when access is lost and regained
- Previously unlocked content may re-lock based on current rules
- Best for: Testing environments, sites still being configured
- Example: User loses “Premium” level, then regains it → drip schedule restarts from day 1
Preserve Previously Unlocked Content
- Keep access to content already unlocked by the user, even if rules or levels change later
- New content still follows current rules
- Best for: Live sites, production environments
- Example: User loses “Premium” level, then regains it → keeps access to lessons they already unlocked, new lessons follow current rules
Important: Choose “Preserve” mode for live sites to avoid frustrating users who lose progress when their subscription renews or level is reassigned.
Creating Drip Rules
Drip rules define what unlocks, when it unlocks, and what else must happen first. The current Drip Content page gives you two ways to build them: the visual Builder tab and the more traditional Rules tab.
Builder Tab vs Rules Tab
- Builder is the main visual workflow. Use it when you want to see the rule as a canvas, click cards, edit per-post overrides, and understand the flow more visually.
- Rules is the compatibility form/list view. Use it if you prefer a classic table and form layout instead of a visual canvas.
- Both tabs save the same kind of global drip rule. You are not creating two different rule systems.
- The Builder also lets you click an individual lesson or post card and add a per-post override directly from the sidebar.
Step by Step: Create Your First Rule in the Visual Builder
The Builder is the best place to learn this because it makes the flow visible while you configure it.
- Go to BricksMembers → Drip Content.
- Open the Builder tab.
- Click Create Rule in the page header, or click New Rule inside the Builder header.
- Give the rule a clear name first, for example Lessons weekly after enrollment.
- In the sidebar, start with Scope & Trigger. Choose the Scope Mode first, because that choice changes the rest of the fields.
- Finish the targeting fields for that scope mode. If the target is wrong, the whole rule will apply to the wrong content.
- Choose the Trigger and the initial delay. This tells BRM what date the rule starts counting from.
- If you want scheduled releases over time, open Timed Auto-Drip and turn it on.
- If you want everyone to start on the same date, open Cohort Timing and configure the cohort source and mode.
- If you need completion-based unlocking, open Prerequisites. This is only for Structure rules.
- Open Conditional Logic and decide whether timing and prerequisites should work as AND or OR.
- Watch the Builder canvas while you work. It is there to help you check whether the rule you are building actually matches the unlocking flow you want.
- If the canvas has moved around, click Fit to reframe it.
- Click Save Rule. Saving the rule also queues the unlock recompute. On larger sites, keep the page open while BRM updates the affected unlock data.
Important: The Builder does not auto-pick some random first rule for you when nothing is selected. If the Builder looks empty, create a new rule or deliberately select the rule you want to edit.
Another important detail: the global timeline mode still belongs to the Settings tab. The Builder shows that context so you can reason about unlock behavior, but if you want to switch between reset and preserve behavior, do that in BricksMembers → Drip Content → Settings.
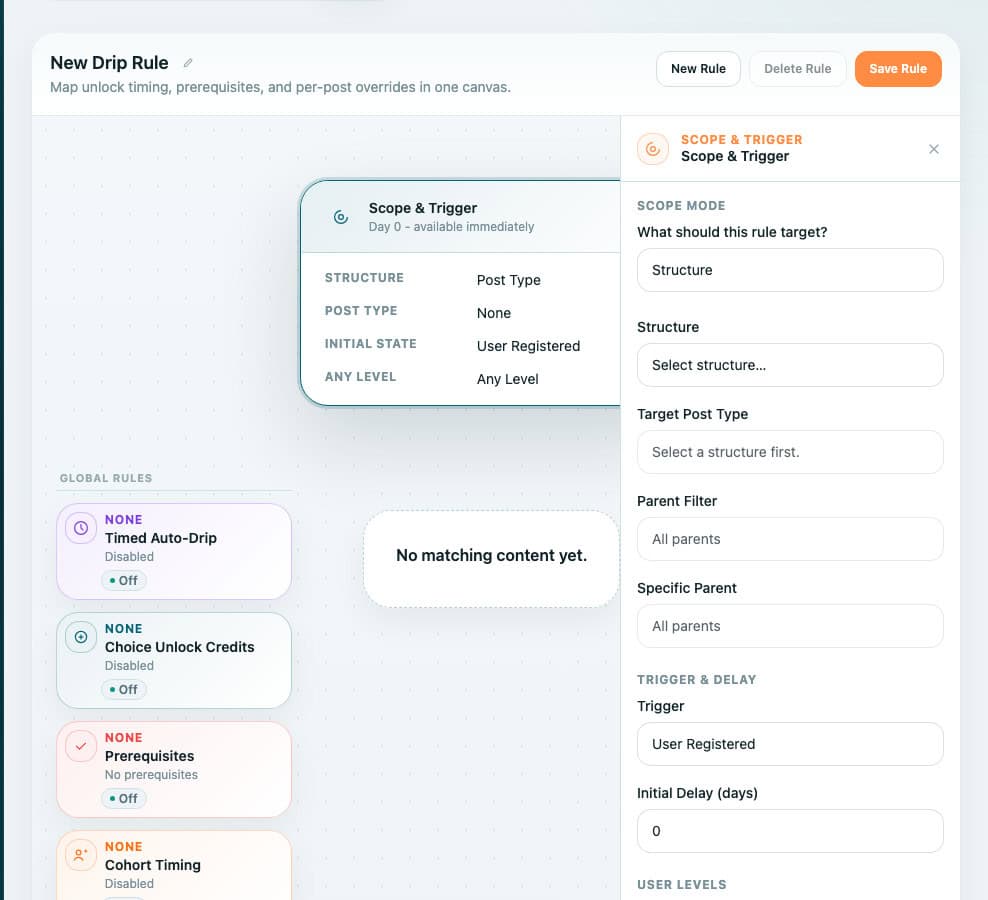
How the Visual Builder Works While You Configure a Rule
- The left side is the canvas. It visualizes the currently selected rule.
- The right side is the sidebar. That is where you edit the rule settings.
- When you change the scope, timing, cadence, prerequisites, or cohort settings, the Builder preview updates so you can see the effect before saving.
- When you click a lesson or target post card in the canvas, the sidebar switches to the Lesson panel so you can configure a per-post override for that one item.
- Nothing becomes the live site rule until you click Save Rule. Editing fields in the Builder alone does not publish the change.
Choice Unlock Credits
Choice Unlock Credits let members choose which lesson or post to unlock from an allowed pool instead of following only a fixed sequence. You configure the grant cadence in the rule, then set how many credits each unlock costs.
- Credits per interval controls how many credits the member earns each grant cycle.
- Default cost controls how many credits a normal lesson or post costs.
- Selected-post cost overrides let you make specific lessons cheaper or more expensive when the choice pool is a hand-picked list of posts.
- Costs and grant amounts are whole numbers from 1 to 100.
On the frontend, show learners the cost and their balance with Drip dynamic tags such as {brm_drip:choice_cost|rule=drip_rule:...}, {brm_drip:choice_balance|rule=drip_rule:...}, {brm_drip:choice_remaining_after_unlock|rule=drip_rule:...}, and {brm_drip:choice_can_afford|rule=drip_rule:...}. Include the rule argument when the same lesson could be part of more than one Choice Unlock rule.
When a member spends credits, BricksMembers deducts the selected lesson cost from that rule’s balance and records one unlock for the selected post. If the selected post is a parent course or module, child lessons are not written as individual unlock rows; use the Drip ancestor conditions, query filters, or ancestor dynamic tags when your design should reveal child content because the parent was selected.
A Good First Example Rule
If you want one clean beginner example, build this first: unlock lessons in a course once per week after enrollment.
- Scope Mode: Structure
- Structure: your course structure
- Target Post Type: Lesson
- Trigger: Enrollment Activated if you use Enrollments, or Level Assigned if access comes from a membership level
- Initial Delay: 0
- Timed Auto-Drip: enabled
- Interval: 7 days
- Items Per Interval: 1
- Release First Item Immediately: enabled if lesson 1 should unlock right away
- Prerequisites: optional; add them only if learners must complete earlier items before later ones unlock
- Conditional Logic: use All conditions must be met (AND) if learners must wait and complete prerequisites
That one example already teaches the most common decisions: what is being dripped, what date the rule starts from, whether release is interval-based, and whether completion gates are required as well.
Scope & Trigger Panel: What to Unlock
Start with the Scope & Trigger panel. This is the most important panel in the Builder because it defines which content the rule can even see.
Rule Name (required): Give your rule a descriptive name like “Unlock lessons daily after registration”.
Scope Mode (required): Choose how this rule targets content:
- Structure – Best for BRM structured course content. Use this when you want structure-aware targeting, parent filtering, cohort controls, and structure-based cadence/prerequisites.
- Selected Posts – Best for a hand-picked list of regular posts, pages, or CPT items. All selected posts must use the same post type, and their saved order becomes the release order for timed auto-drip.
- Post Type – Best when you want one rule to apply to all published posts of a public post type such as
post,page, or one of your own CPTs. You can optionally narrow the rule to one taxonomy and one or more selected terms from that post type.
How to choose correctly: if you are dripping lessons inside a BRM course structure, pick Structure. If you just want a curated list of standalone posts or pages, pick Selected Posts. If you want one wide rule for an entire CPT, pick Post Type.
Structure (required in Structure mode): Select which content structure this rule applies to. Each structure rule is scoped to a single structure. For example, if you have a “WordPress Mastery Course” structure, select it here.
Target Post Type (required in Structure mode): Select which post type within the structure this rule applies to. For example, if your structure has “Course”, “Module”, and “Lesson” levels, you might select “Lesson” to apply this rule to all lessons in the structure.
Parent Filter (optional UI helper): This dropdown helps you narrow down the Specific Parent options. For example, if you select “Module”, the next field will only show module posts. This field is mainly there to make the next selector easier to use.
Specific Parent (optional): Narrow down to posts of the selected type that have this specific post anywhere in their parent chain. For example, if you select Post Type “Lesson” and Specific Parent “Advanced Module”, the rule only applies to lessons that have “Advanced Module” as a parent (direct or indirect). Leave empty to apply to all posts of the selected type within the structure.
Selected Post Type and Selected Posts (required in Selected Posts mode): First choose the post type, then search and add the posts you want to drip. You can drag them into the exact order you want to release them. That drag order matters, because BRM uses it as the timed release order for this mode.
Post Type (required in Post Type mode): Choose one public post type. The rule will apply to every published post of that type, even if those posts are not part of a BRM content structure.
