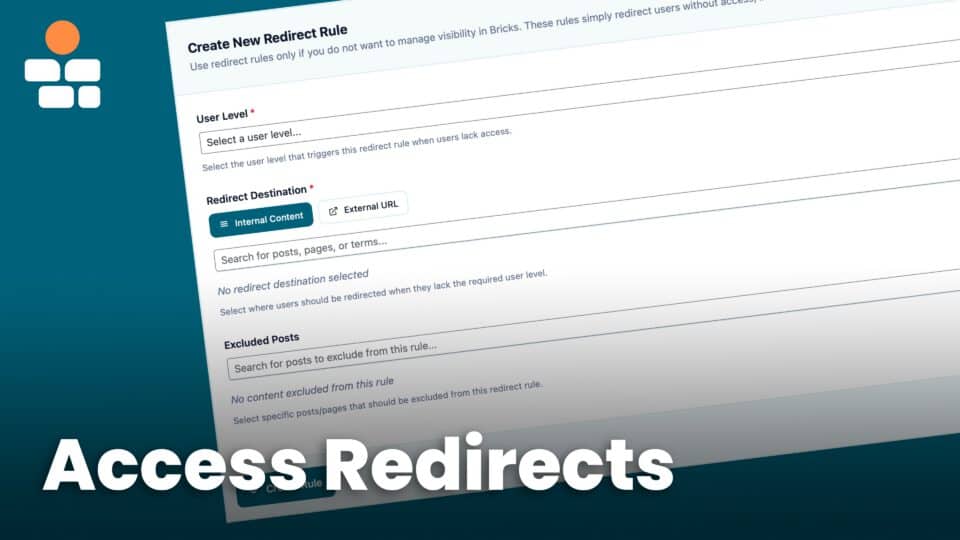
When a user tries to access content they don’t have permission to view, what happens? By default, they might see the content (bad for security) or a generic error message (bad for user experience). BricksMembers’ Access Redirect system lets you control exactly what happens, creating seamless upgrade flows and better user experiences.
What you’ll learn:
- How access redirects work
- Setting up Login-Only Content for mostly public sites
- Setting up logged-out redirects (site-wide)
- Configuring access redirect rules
- Creating custom access denied pages
- Building upgrade flows
- Troubleshooting redirect issues
Prerequisites:
- BricksMembers installed and activated
- At least one user level created
- Some content with required levels assigned
Part 1: Understanding Access Redirects
The Problem
Scenario 1: A logged-out visitor tries to access a members-only page.
- Bad: They see the content (security breach)
- Bad: They see a generic “Access Denied” message (poor UX)
- Good: They’re redirected to the login page or a proper message with call to action is shown
Scenario 2: A free member tries to access premium content.
- Bad: They see the content (security breach)
- Bad: They see a generic error (no path forward)
- Good: They’re redirected to an upgrade page explaining the benefits or there’s an upgrade message instead of the content
In this post, we will focus on the redirects instead of showing CTA and upgrade messages. Showing messages, ideally together with teaser content in Bricks Builder using BricksMembers conditional logic is recommended, but in some cases, you might want to use the old-fashioned redirect approach.
The Solution for redirects
BricksMembers provides three main access-control redirect modes, plus an enrollment-specific redirect:
1. Login-Only Content
- Select only the pages, terms, post types, or Bricks templates that require login
- Every other page stays public
- Requires any logged-in WordPress user; it does not check BRM user levels
2. Whole-Site Login Gate
- Redirect ALL logged-out users to the login page
- Useful for fully private membership sites
- Uses Public Exceptions for pages that should remain open
3. User-Level Redirects
- Redirect users without required BRM levels to a specific page
- Can be different for each user level
- Useful for upgrade flows and custom messaging
- Redirect users when enrollment is the only failing gate
- Useful for course signup pages, enrollment landing pages, and self-service onboarding flows
- Configured separately inside BricksMembers → Access Control
Part 2: Login-Only Content
Use Login-Only Content when most of your site is public and only a handful of pages should require a visitor to be logged in. This is the right mode for “Active Members can open these pages, but the rest of the site stays open” when the first check is simply WordPress login status.
- Go to BricksMembers → Access Control → Login Access
- Turn Require login for the whole site OFF
- Under Login-Only Content, search for the pages, terms, post types, or Bricks templates that should require login
- Set Redirect logged-out visitors to if you want a custom destination, or leave it empty to use the Bricks login page or
wp-login.php - Click Save Changes
Result: selected targets redirect logged-out visitors, logged-in visitors can open them, and all unselected targets stay public. BRM user levels are not checked in this mode.
Part 3: Whole-Site Login Gate
When to Use the Whole-Site Login Gate
Use the whole-site login gate when:
- Your entire site is members-only (no public content)
- You want to force login before accessing any page
- You’re building a private community
Don’t use the whole-site login gate when:
- You have public content (blog, marketing pages)
- You want visitors to browse before signing up
- You’re building a freemium site with public and member content
Setting Up the Whole-Site Login Gate
- Go to BricksMembers → Access Control
- Open the Login Access tab
- Require login for the whole site: Toggle ON
- Add any Public Exceptions that should remain open
- Click Save Changes
Result: All logged-out visitors are redirected to the WordPress login page when they try to access any page except Public Exceptions and authentication pages.
Automatic Exclusions
BricksMembers automatically excludes these pages from logged-out redirects:
- WordPress login page (
/wp-login.php) - WordPress registration page
- WordPress lost password page
- WordPress reset password page
- Bricks custom auth pages (if you’ve set them in Bricks → Settings):
- Custom login page
- Custom registration page
- Custom lost password page
- Custom reset password page
Why: Users need to access these pages to log in, register, et cetera, so they’re never redirected.
Adding Custom Exclusions
If you have other pages that should be accessible to logged-out users (e.g., a sales page), add them to the exclusion list. Current versions can exclude individual content, taxonomy archives, content-type/archive-style targets, search/error/front/blog pages where applicable, and active Bricks template assignments.
- Go to BricksMembers → Access Control
- Find the redirect exception target picker
- Search for and select the content, taxonomy, content type, query target, or active Bricks assignment that should be excluded
- Click Save Settings
Result: These pages are accessible to logged-out users even with logged-out redirects enabled.
Part 4: Setting Up the Fallback Redirect
The fallback redirect applies when a user lacks access and their level doesn’t match any specific redirect rule. It’s like a “catch-all” for access denials.
- Go to BricksMembers → Access Control
- Scroll down to the Fallback Redirect card
- Click Internal Content or External URL
- For internal: Search for and select a page (e.g., “Login Required” or “Upgrade”)
- For external: Enter the full URL
- Click Save Fallback Redirect
Result: Users without access are redirected to this page when no level-specific rule matches.
Part 5: Creating Level-Specific Redirect Rules
Level-specific redirect rules let you redirect different user levels to different pages. These rules take priority over the fallback redirect.
Creating a Redirect Rule
You can redirect different user levels to different pages.
Example:
- Free members trying to access premium content → “Upgrade to Premium” page
- Premium members trying to access VIP content → “Upgrade to VIP” page
- Logged-out users → “Login” page (via fallback)
Steps:
- Go to BricksMembers → Access Control
- Scroll to Redirect Rules section
- In the Create Redirect Rule form:
- User Level: Select “Free Member”
- Redirect Destination: Choose Internal or External
- If Internal: Search for and select “Upgrade to Premium” page
- Excluded Posts (Optional): Search for posts where this rule should NOT apply
- Click Create Rule
- Repeat for other levels (Premium Member → “Upgrade to VIP”)
- Click Save Settings
Result: Each user level is redirected to a different page when they lack access.
How Redirect Priority Works
When a user tries to access protected content:
- BricksMembers checks which user levels are required for that content
- It checks if the user has any of those required levels
- If the user doesn’t have access, it looks for a redirect rule matching one of the required levels
- If a matching level-specific rule is found, the user is redirected to that rule’s destination
- If no matching rule is found, the user is redirected to the Fallback Redirect destination
- If no fallback is configured, no redirect occurs (the access control system will still prevent them from seeing the content)
Example flow:
- Free Member accessing premium content → “Upgrade to Premium” (level-specific rule for “Free Member”)
- Premium Member accessing VIP content → “Upgrade to VIP” (level-specific rule for “Premium Member”)
- Logged-out user accessing any member content → “Login Required” (fallback redirect)
Important: Logged-out users are handled first by the logged-out and private-site redirect settings, but access redirect fallback/rules can also apply when anonymous visitors hit protected content. Test both logged-in and logged-out paths for important protected pages.
Part 5: Creating Custom Access Denied Pages
Instead of generic error pages, create beautiful, persuasive access denied pages.
Example 1: Upgrade to Premium Page
Goal: Convince free members to upgrade.
Steps:
- Create a new page: “Upgrade to Premium”
- Edit with Bricks Builder
- Add:
- Heading: “Unlock Premium Content”
- Text: “You’re trying to access premium content. Upgrade now to get:”
- List: Benefits (access to premium courses, downloadable resources, priority support, etc.)
- Button: “Upgrade Now” → Link to your payment page
- Text: “Already upgraded? Log in to your account“
- Optional: Add an icon, content previews etc. – everything that makes users interested helps
- Publish the page
- Go to BricksMembers → Access Control
- Create a redirect rule for “Free Member” level pointing to this page
Result: Free members see a compelling upgrade page instead of an error.
Example 2: Login Required Page
Goal: Prompt logged-out users to log in.
Steps:
- Create a new page: “Login Required”
- Add:
- Heading: “Members Only”
- Text: “This content is for members only. Please log in to continue.”
- Button: “Login” → Link to login page
- Text: “Don’t have an account? Sign up here”
- Publish the page
- Set this as the Fallback Redirect destination
Result: Logged-out users see a friendly login prompt.
Part 6: Best Practices
Practice 1: Always Provide a Path Forward
- Bad: “Access Denied. You don’t have permission.”
- Good: “Upgrade to Premium to access this content. [Upgrade Now]”
Why: Users know what to do next.
Practice 2: Explain the Benefits
On your redirect page, explain what they’ll get:
- List specific benefits
- Show pricing
- Include testimonials
- Add a clear call-to-action
Practice 3: Test All Redirect Paths
After setting up redirects:
- Log out and test
- Log in as a free member and test
- Log in as a premium member and test
- Verify each redirect goes to the correct page
Practice 4: Use Friendly Language
- Bad: “Error 403: Forbidden. Access Denied.”
- Good: “This content is for Premium members. Upgrade to unlock!”
Why: Friendly language reduces frustration and increases conversions.
Practice 5: Provide Alternative Options
On redirect pages, offer alternatives:
- “Not ready to upgrade? Browse your free content”
- “Have questions? Contact support“
- “Already a member? Log in to your account“
Part 7: Common Issues and Solutions
Issue 1: Redirect Loop (Infinite Redirects)
Cause: Redirect destination page also requires a level the user doesn’t have.
Solution:
- Ensure redirect destination pages have NO required levels
- Or set required levels to a level everyone has (e.g., “Free Member”)
- Check that the redirect destination isn’t redirecting to itself
Issue 2: Login Page Redirects to Itself
Cause: Custom login page is not automatically excluded unless used in Bricks Authentication Pages
Solution:
- If using a custom login page, add it to Public Exceptions in Access Control
- Or set it as a Bricks custom auth page in Bricks → Settings
Part 8: Integration with Other Features
Menu Visibility
Combine redirects with menu visibility for a seamless experience.
Setup:
- Hide premium content links from free members (Menu Visibility)
- If they access the URL directly, redirect to upgrade page (Access Redirects)
Result: Free members don’t see the link in navigation, and if they somehow access it, they’re redirected.
Webhooks
Automatically grant access after purchase.
Setup:
- Set up webhook from payment processor (see Post 16: Webhooks)
- Map product to user level
- When user purchases, they automatically get the level
- They can now access content (no more redirects)
Result: Instant access after purchase.
Summary
You’ve learned how to:
- ✅ Understand how access redirects work (Login-Only Content, Whole-Site Login Gate, and User-Level Redirects)
- ✅ Set up logged-out redirects for fully private sites
- ✅ Configure level-specific redirect rules
- ✅ Create custom access denied pages with compelling upgrade messages
- ✅ Build complete upgrade flows from discovery to purchase
- ✅ Use excluded posts for special cases
- ✅ Implement advanced redirect strategies
- ✅ Follow best practices for user experience and conversions
- ✅ Troubleshoot common redirect issues
Your membership site now provides a seamless, user-friendly experience for all visitors, regardless of their access level!
