BricksMembers lets you define custom profile fields, let members edit them via Bricks forms, display them anywhere with dynamic tags, and build member directories with user query loops. This guide covers the complete setup from admin configuration to frontend display.
What you’ll learn:
- Enable the Member Profiles module
- Define custom profile fields in the admin
- Use Bricks form actions to update profile data (core fields and custom fields)
- Map form fields correctly for each form action
- Display profile data with dynamic tags
- Build member directories with user query loops and filters
Prerequisites: Bricks Builder and BricksMembers installed.
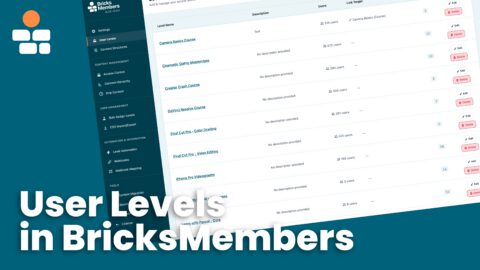
Part 1: Enable Member Profiles
Before you can use custom profile fields, you must enable the Member Profiles module.
- Go to BricksMembers → Settings
- Open the Modules tab
- Find Member Profiles (under Content & Engagement) and enable it
- Click Save Settings
Once enabled, the User Profile Fields submenu appears under BricksMembers.
Part 2: Define Custom Profile Fields
Custom profile fields are defined in the admin. Users then fill them out via Bricks forms, and you display them with dynamic tags.
Field Types
BricksMembers supports these field types:
- Text – Single line
- Textarea – Multi-line
- Email – Validated email
- URL – Validated URL
- Number – Numeric
- Date – Date picker
- Select Dropdown – Single choice (options, one per line)
- Checkbox – Single or multi-checkbox
- Image – Profile photo or avatar (stored as attachment ID)
Creating a Field
- Go to BricksMembers → User Profile Fields
- Click Add Field
- Set Field Key – lowercase, numbers, underscores only (e.g.
phone_number,job_title). This is used in dynamic tags:{brm_user:field:phone_number} - Set Label – shown to users in forms
- Choose Type
- Set Visibility: Public (everyone), Members Only (logged-in), Private (only owner)
- For Select fields, add options one per line (plain values or
value:Label) - Click Save Fields
Example: Create a field with key bio, label “Short Bio”, type Textarea. Later you’ll use {brm_user:field:bio} to display it.
Part 3: Bricks Form Actions
BricksMembers adds several form actions to Bricks forms. Use them to let logged-in users update their profile, change password/email, manage privacy, upload an avatar, export their data (GDPR), or delete their account. All profile-related actions require the user to be logged in.
Action 1: BRM Update Profile
Updates WordPress core user fields: first name, last name, display name, bio (description), and website URL.
What it needs:
- First Name Field ID – The form field ID for first name (without
form-field-prefix) - Last Name Field ID – Form field ID for last name
- Display Name Field ID – Form field ID for display name
- Bio/Description Field ID – Form field ID for bio
- Website URL Field ID – Form field ID for website
How to map: In Bricks, when you add a form element, you assign it an ID (e.g. first_name). In the form’s Content tab, under the BRM Update Profile action, enter that ID in the corresponding setting. Leave any field blank if you don’t use it.
Example mapping:
- Form field ID:
first_name→ First Name Field ID:first_name - Form field ID:
last_name→ Last Name Field ID:last_name - Form field ID:
display_name→ Display Name Field ID:display_name - Form field ID:
bio→ Bio/Description Field ID:bio - Form field ID:
website→ Website URL Field ID:website
Action 2: BRM Update Custom Fields
Updates the custom profile fields you defined in BricksMembers → User Profile Fields.
What it needs: A dropdown mapping for each custom profile field. Bricks auto-populates the dropdown with your form field IDs (map_fields).
- Add the form action BRM Update Custom Fields
- You’ll see one dropdown per custom profile field (e.g. “Phone Number (Text)”, “Avatar (Image)”)
- Select which form field should update each profile field
- For Image fields, use a Bricks File Upload field. The form will save the uploaded image as the user’s profile image for that field.
Field type matching:
- Text / Textarea / Email / URL / Number → Use Bricks Text, Textarea, or Email fields
- Date → Use Bricks Date field
- Select → Use Bricks Select field with matching options
- Checkbox → Use Bricks Checkbox field
- Image → Use Bricks File Upload field (image types)
Action 3: BRM Privacy Settings
Updates the user’s overall profile visibility (who can see them in member directories). Requires Member Profiles module.
Field mapping:
- Visibility Field ID – Form field ID for a Select field. The field must submit one of:
public,members, orprivate
Use a Bricks Select field with options: public (Public), members (Members Only), private (Private). The stored value must match exactly.
Action 4: BRM Change Password
Changes the user’s password. Verifies current password, validates new password (min 8 characters), and re-logs the user in after success.
Field mapping:
- Current Password Field ID – Form field ID for current password (use Bricks Password field)
- New Password Field ID – Form field ID for new password
- Confirm Password Field ID – Form field ID for confirmation (optional; if blank, the new password field is used for both)
Action 5: BRM Change Email
Initiates an email change. User enters new email and current password. A verification link is sent to the new email; the change completes only when the user clicks the link (within 24 hours).
Field mapping:
- Password Field ID – Form field ID for password verification
- New Email Field ID – Form field ID for the new email address
Action 6: BRM Upload Avatar
Uploads a custom avatar for the logged-in user. Requires Member Profiles module. Stores the image as a WordPress attachment and associates it with the user.
Field mapping:
- File Upload Field ID – Form field ID for a Bricks File Upload field. Allowed types: JPG, PNG, GIF, WebP
User must have upload_files capability. Enable “Save files locally” in the Bricks form if needed.
Action 7: BRM Delete Account
Self-service account deletion. Requires password verification and typing “DELETE” to confirm. Administrators cannot delete their account this way.
Field mapping:
- Password Field ID – Form field ID for password verification
- Confirmation Field ID – Form field ID where user must type
DELETE(case-insensitive) - Redirect URL – URL to redirect to after deletion (optional; defaults to home page)
Action 8: BRM Export Data (GDPR)
User-initiated GDPR data export. Generates a JSON file with user data, profile fields, membership levels, progress, and liked posts. No field mapping needed—just add the action and a Submit button. On success, the user is redirected to download the file.
Action 9: BRM Assign User Levels
Assigns one or more BricksMembers levels to a user. The user is identified by the email address in the form. Use on registration forms (with Bricks Create User action) or on forms that include an email field. Select which level(s) to assign in the action settings—no field mapping required.
Common use: Registration form with Create User + Assign BRM User Levels. The new user receives the selected level(s) immediately after signup.
Building a Profile Edit Form
- Add a Form element in Bricks
- Add form fields: Text for first_name, last_name, display_name; Textarea for bio; Text (or URL) for website; plus any custom fields (Text, Select, File Upload for image, etc.)
- Set each field’s ID to match what you’ll use in the form actions (e.g.
first_name,avatar) - In the form’s Content tab → Actions, add BRM Update Profile
- Fill in the Field ID mappings (first_name, last_name, etc.)
- Add BRM Update Custom Fields and map each custom field to its form field
- Add a Submit button. Ensure the form is shown only to logged-in users (use Bricks conditions: Logged In).
Part 4: Dynamic Tags for Profile Data
Display profile data anywhere in Bricks using dynamic tags. These tags work for the current user, or for the user in a user query loop (member directory).
Core User Tags (Always Available)
{brm_user:levels}– Comma-separated level names{brm_user:levels:link}– Level names as links{brm_user:levels_count}– Number of levels{brm_user:has_level:ID}– 1 if user has level ID, 0 otherwise
Profile Tags (Member Profiles Module)
When Member Profiles is enabled, these tags become available:
{brm_user:avatar}– Avatar URL (WordPress gravatar or custom avatar){brm_user:avatar:96}– Avatar with size modifier (e.g. 96, 150, 256, large, 150×150){brm_user:last_login}– Last login date (if tracked){brm_user:last_login:Y-m-d}– Last login with custom date format{brm_user:field:key}– Custom profile field value. Replacekeywith your field key (e.g.{brm_user:field:phone_number},{brm_user:field:bio})
Image Field Modifiers
For image-type custom fields, use modifiers with {brm_user:field:key}:
{brm_user:field:avatar:url}– Image URL only{brm_user:field:avatar:id}– Attachment ID{brm_user:field:avatar:large}– Image size (thumbnail, medium, large, full)
Bricks Image element: Use {brm_user:field:avatar} directly in an Image element’s Dynamic Data field. Bricks will render the image correctly.
Context: Current User vs. Loop User vs. Profile Page
BricksMembers uses a smart detection cascade to determine which user’s data to display with {brm_user:*} tags:
- Bricks user query loop – If you’re inside a user query loop (e.g. member directory), the looped user is always used. This takes highest priority.
- Author archive page – On a WordPress author archive (
/author/username/), the author being viewed is used. Requires author detection to be enabled in settings. - URL parameter or clean URL – If the URL contains a user parameter (e.g.
?user=123) or matches a clean profile URL (/member/username/or/profile/123/), that specific user is resolved. Requires URL parameter detection to be enabled in settings. - Current logged-in user – If none of the above apply, the visitor’s own data is shown. This is the default fallback.
So in a member card template inside a loop, {brm_user:field:bio} shows that member’s bio, not the visitor’s. On a profile page at /member/john/, it shows John’s bio. On your own account page with no URL parameter, it shows the logged-in visitor’s bio.
Configuring Profile Page Detection
Go to BricksMembers → Settings → Modules tab. When the Member Profiles module is enabled, a Profile Pages card appears with two settings:
- Profile User Detection – Choose which detection methods are active:
- Current logged-in user only – Tags always show the visitor’s own data
- Current user + URL parameter – Also detect from URL parameters and clean URLs
- Current user + author archives – Also detect on author archive pages
- Current user + URL parameter + author archives (default) – All methods enabled
- URL Parameter Name – The query parameter used in URLs (default:
user). For example, with the default,?user=123shows user 123’s profile. This field is only visible when URL parameter detection is enabled.
When URL parameter mode is active, BricksMembers automatically registers clean URL patterns: /member/username/ resolves by username and /profile/123/ resolves by user ID. You can use these instead of query string parameters for friendlier URLs.
Building a Public Profile Page
With profile page detection enabled, you can build public-facing profile pages without needing a custom post type:
- Create a regular WordPress page (e.g. “Member Profile”)
- Design it in Bricks using
{brm_user:*}dynamic tags – avatar, display name, bio, custom fields, levels, etc. - Link to this page with a user parameter:
/member-profile/?user=123or use the clean URL/member/username/ - All
{brm_user:*}tags on that page will automatically display the specified user’s data
Tip: In a member directory loop, link each member card to the profile page with their user ID: /member-profile/?user={wp_user_id} or /member/{wp_user_login}/
Part 5: Member Directories with User Query Loops
Use Bricks’ User query loop to build member directories, course participant lists, or team pages. BricksMembers adds filters to narrow the results.
Setting Up a User Query Loop
- Add a Container, Section, or Block
- Enable Use query loop in Content tab
- Set Query → Object Type to User
- Configure role, order, posts per page as needed
- Add child elements inside (Image, Heading, Text) – these repeat for each user
- Use dynamic tags in child elements:
{wp_user_display_name},{brm_user:avatar},{brm_user:field:bio},{brm_user:levels}
BricksMembers Filters for User Query Loops
On the element with the user query loop, scroll down in the Content tab to find BricksMembers filters.
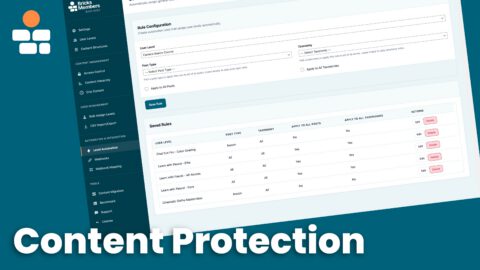
- User Level Match – Filter users by membership level. Options: Match, Match + Empty, No Match, No Match + Empty. Select the level(s) to filter by.
- Respect Profile Visibility (Member Profiles only) – When enabled, hides users with private profiles from logged-out visitors, and hides private profiles from everyone except the owner.
Example: Show only Premium members: User Level Match = Match, select “Premium” level. Result: Only users who have the Premium level appear in the directory.
Profile Visibility Explained
Each custom profile field has a Visibility setting:
- Public – Visible to everyone
- Members Only – Visible only when logged in
- Private – Visible only to the profile owner
The Respect Profile Visibility filter uses the user meta key _brm_profile_visibility (set per-user in their profile, e.g. via the Bricks privacy settings form or the user edit screen). If a user has set their overall profile visibility to private, they are excluded from directory listings when this filter is enabled. This is separate from per-field visibility (Public, Members Only, Private) on individual custom profile fields.
Part 6: Complete Example
End-to-end setup for a member profile and directory:
- Enable Member Profiles in BricksMembers → Settings
- Create custom fields in BricksMembers → User Profile Fields:
bio(Textarea),job_title(Text),avatar(Image) - Profile edit page: Add a Form with fields first_name, last_name, display_name, bio, job_title, avatar (File Upload). Add BRM Update Profile (map first_name, last_name, display_name, bio). Add BRM Update Custom Fields (map job_title, avatar). Condition: Logged In.
- Profile display: On the same page, show
{brm_user:avatar},{wp_user_display_name},{brm_user:field:job_title},{brm_user:field:bio} - Member directory page: Add Container with User query loop. Set User Level Match = Match, select your member level. Enable Respect Profile Visibility. Inside the loop: Image with
{brm_user:avatar}, Heading with{wp_user_display_name}, Text with{brm_user:field:job_title},{brm_user:levels}.
Troubleshooting
Form action not saving: Check that form field IDs match exactly (no form-field- prefix). Ensure the user is logged in.
Dynamic tag shows nothing: Confirm Member Profiles is enabled. Verify the field key (lowercase, underscores). In a query loop, ensure you’re using the right loop type (User for member directories).
Image field not updating: Use a Bricks File Upload field. Enable “Save files locally” if needed. Ensure the user has upload_files capability.
User query filter not applied: Filters appear on the element with the query loop (Container/Section/Block). Ensure Object Type is User. For User Level Match, select at least one level.