
Once you have user levels in place, the next job is deciding how each visitor experiences your content. BricksMembers gives you two complementary toolsets for that job: Bricks conditional logic (show/hide exactly what you want) and access redirects (block entire posts). This article walks through both, with a focus on the conditional logic options that are unique to BricksMembers.
Why We Lead With Bricks Conditions
Conditional logic keeps users on the page, lets you explain what’s missing, and turns “no access” moments into upgrade opportunities. Redirects are still available, but they’re intentionally the backup plan.
- Context – Show the lesson teaser, mention the level that unlocks it, drop a CTA
- Conversion – Swap buttons, banners, and navigation based on a user’s current plan
- Mixed layouts – Blend accessible and restricted blocks on the same page instead of cloning templates
- No dead ends – Users see tailored messaging instead of a redirect with no explanation
Understanding BricksMembers Conditions
BricksMembers registers two access-focused conditions that often get confused. They solve different problems:

User Level Match
Checks whether the current user can access the current post. It reads the post’s required levels, looks at the user’s levels, and includes “+ Empty” modes when the post is public.
Use it whenever you’re protecting the content that’s currently being viewed (lesson page, article, download, etc.).
Modes
- Match: User has at least one required level
- Match + Empty: User has access OR the post has no requirements (public)
- No Match: Post is restricted and the user lacks all required levels
- No Match + Empty: No access OR the post is public (useful for teasers)

Has Access To Level(s)
Ignores the current post and simply checks the user’s levels. You pick one or more levels, choose in (has at least one) or not in (has none), and the condition reacts instantly.
Use it for global UI (dashboards, menus, popups), cross-selling (“show this block only to Gold members”), or when you’re mixing data sources via query loops.
Common uses
- Display a VIP promo only to users who already own Starter or Plus
- Hide “Join now” CTAs from people who already have the level
- Swap navigation menus or headers based on plan
- Show onboarding checklists exclusive to specific tiers
Rule of thumb: If the content lives on the current post, start with User Level Match. If you’re targeting the user regardless of the current post (dashboards, templates, reusable sections), use Has Access To Level(s).
Quick Example: Lesson Layout
- Lesson video: User level match → Match
- Lesson resources: User level match → Match
- Locked overlay: User level match → No Match
- Upgrade CTA: Has access to level(s) → in → [Free] (only free members see the upsell, even if the post is public)
- “Already upgraded?” notice: Has access to level(s) → in → [Premium, VIP]
You end up with a single page that adapts to every scenario without duplicating templates.
Working With Query Loops
Query loops handle post lists (courses, lessons, downloads, etc.) and of course all other WordPress content, just as usual. BricksMembers adds the same access logic to the query itself so you don’t have to manually hide items after they load.
Key filter: User Level Match (Bricks → Query Loop → Filter → BricksMembers)
- Match: Only posts the user can access
- Match + Empty: Accessible posts plus anything with no required levels (great for catalogues that mix free + paid)
- No Match: Perfect for “Locked lessons” lists
- No Match + Empty: Show what is locked plus public items (useful for marketing pages)
Has Access To Level(s) also exists as a query filter. Use it when you’re building dashboards like “Hide posts that belong to the Free level.”
Workflow
- Add a query loop and set it up as usual with the post type you want
- Close the query loop pop-up and scroll down to the BricksMembers section
- Add BricksMembers → User Level Match
- Choose Match or Match + Empty
- Add Has Access To Level(s) if you need to scope the results to specific plans
- Design the loop items normally (and still layer element-level conditions if you need progress or drip checks)
Result: Users only see posts they can actually open, and Bricks never renders unnecessary cards.
Putting It Together: Example Page Flow
Imagine a course hub built with one template:
- Hero: Has access to level(s) → in → [Course Owner] to swap the hero button between “Start Course” and “Buy Now.”
- Lessons grid: Query loop with User Level Match → Match + Empty so members see everything they can open and free readers still see public lessons.
- Locked lesson banner: Query loop copy with User Level Match → No Match to show what’s locked plus an explanation of the required level.
- Progress block: Add Progress == Completed on “Mark as done” buttons, or Progress == Not Completed on “Continue lesson” prompts.
- Drip notice: Drip == Locked to show countdowns when the drip schedule blocks access.
Because every condition shares the same snapshot cache, you can stack these without worrying about performance. BricksMembers resolves the user/post data once per request.
For query loops, if you don’t use any BricksMembers filter, but BricksMembers dynamic tags, elements, or conditions inside the loop, turn BricksMembers → Enable Batch Loading on. That loads all the BricksMembers data inside the loop in batches, what greatly reduces database queries and therefore speeds up the page.
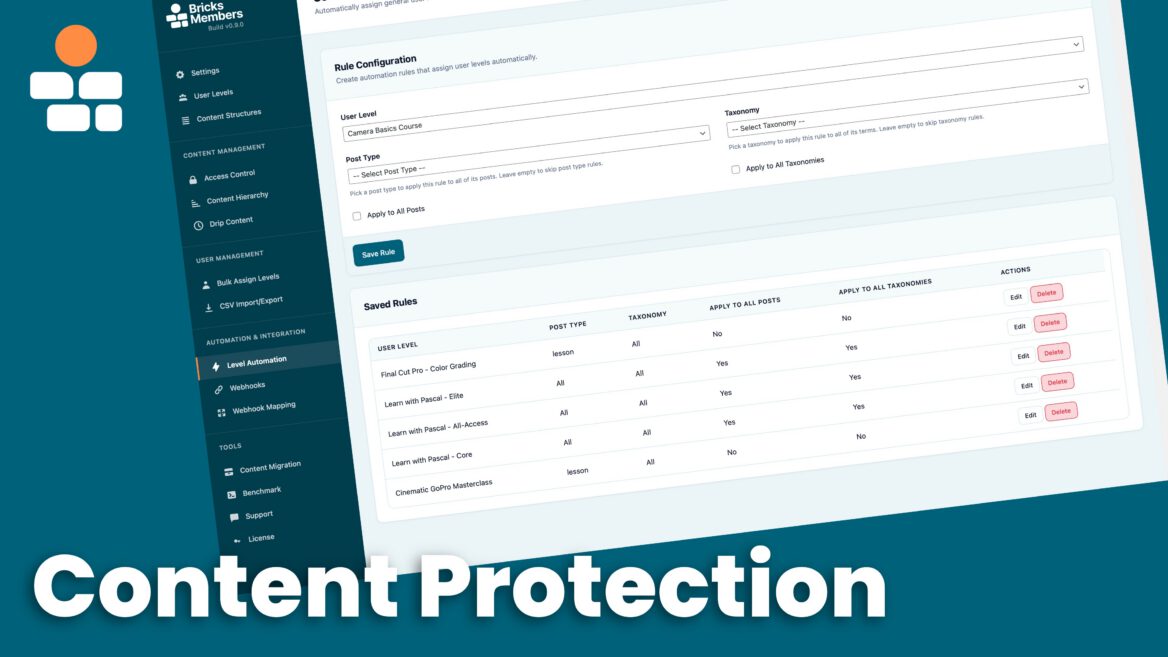
Access Redirects (When You Truly Need Them)
If you prefer the classic “block entire post” flow, enable redirects in BricksMembers → Access Control in the WordPress backend. You only need two URLs:
- Logged-out redirect – Typically your login or join page – can be set under Bricks → Settings → Custom authentication pages
- Insufficient access redirect – Usually a pricing or upgrade page
Once those are set, assign required levels inside the post sidebar/meta box just like you would for conditional logic. BricksMembers will:
- Redirect logged-out visitors to your login page
- Redirect logged-in members who lack the required level to your upgrade page
- Bypass redirects automatically on login, registration, and password pages so users can still access those forms
When redirects make sense: simple “all-or-nothing” memberships, legacy migrations that expect blocking behavior, or situations where you don’t want to design custom “no access” layouts.
Assigning Required Levels
Both methods rely on the same access data. Any post (including custom post types) can require one or more user levels. Selection uses OR logic – if you check three levels, the user only needs one of them.
- Edit a post or page inside WordPress
- Locate the BricksMembers meta box (sidebar in block editor, panel in Classic editor)
- Select the required level(s)
- Update the post
Need to protect multiple posts at once? Use Bulk Edit or Quick Edit from the post list—the BricksMembers fields are available in both so you can assign levels en masse.
Best Practices Checklist
- Lead with User Level Match when protecting the post someone is currently viewing.
- Use Has Access To Level(s) for global UI, dashboards, menus, popups, or any reusable section that isn’t tied to the current post.
- Filter query loops instead of hiding cards after they render—your loops stay performant and accurate.
- Preview with Bricks’ user switcher to confirm Match vs No Match behavior for every tier.
- Reserve redirects for the rare cases where a full-page block is acceptable.
- Explain the “why” on every locked section: mention the level name and give a direct upgrade path.
